|
for 2015 addendum re: jib track, click here ...
Aboard
SHADES,
we normally use about 20 feet (six metres) of
quarter-inch braided
dacron
rope as a jib sheet. (see photo below which
shows my actual jib
sheet
although the rest of the gear belongs to my
"borrowed boat kit", for
use
in case I need to rig a borrowed boat at the
Worlds, etc. SHADES
was pretty well packed up for the winter in my
garage, so I used the
borrowed
boat kit stuff for these photos before getting up
enough energy to
squeeze
into the garage to lift the cover and take some
other pics.) 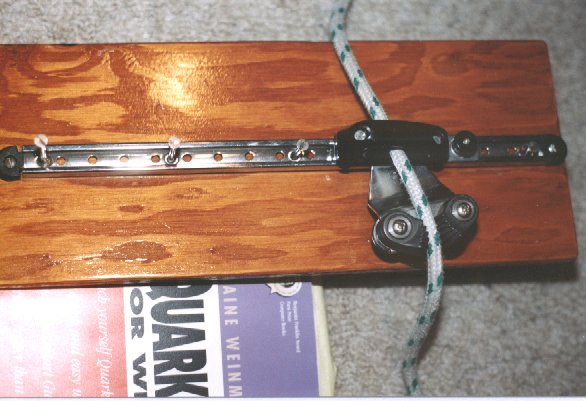 Please note that this line is quite slippery when you first buy it. It took us several regattas' worth of racing to get rid of the shine on the rope and replace it with the nice, soft fuzz you see above. ..... 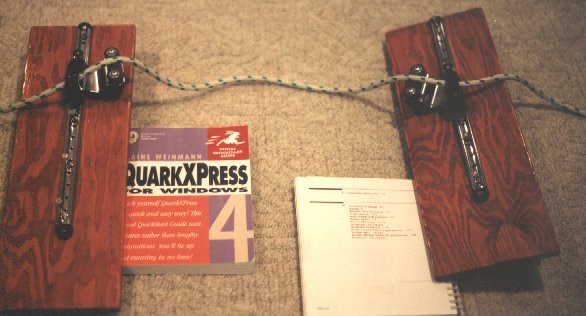 We mostly use the sheet as a continuous sheet (see attempted demonstration in the photo above). To do this, you merely run one end of the sheet out through each fairlead from inboard to outboard, and then tie each end (with a bowline) through the jib clew grommet. Other methods of attaching a continuous sheet to the clew exist, but we have found the bowline method works best. If you prefer not to use the continuous sheet method, take the 20 feet of sheet and "fold" it in half. Shove about 6 inches (15 cm.) of the loop thus produced through the jib clew grommet, insert the loose ends through that loop and pull the loose ends (together!) until you have a good, tight knot at the clew. Other knots can be used, but this is the fastest way and, in my experience, will hold even under great tension from one sheet or the other. If you use a lot of different sheets or jibs, and don't like the continuous sheet method, you can use the method we used until about 10 years ago: Fold the sheet in half and make a two-inch (5 cm.) loop by means of a good, strong seizing with waxed whipping thread. This way, you can attach the sheet to the clew grommet by means of a shackle. It
takes the
crew a
bit of time to get used to the continuous sheet
method - I was learning
it when Wayfarer Man took over the helm a couple of
times this year
(2000).
During a tack or gybe, the crew has to stay inside
the triangle (2
fairleads
and the jib clew) formed by the sheet, or things get
a bit messy. But
the
beauty of this system is that you (virtually) never
totally lose the
sheet
or grab the wrong one. 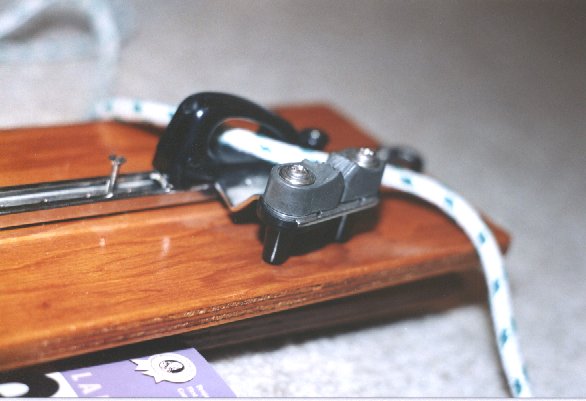 Using a sheet that is no more than 8 mil. in diameter not only makes your sheet cheaper to buy, it also stays in the cleat better. In the photo above, there are several useful things to note:
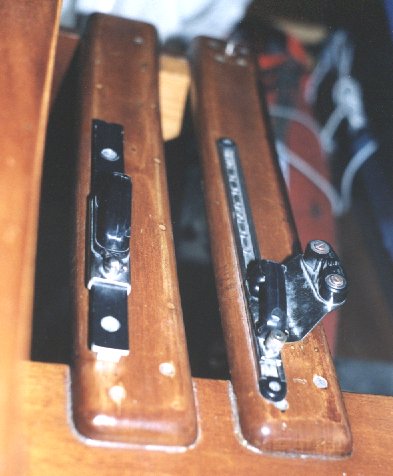 The photo above shows the actual jib track arrangement we use on SHADES. Once every year or two, we use the outer track as well as the inner one - in survival conditions with major waves. I had the spare track and cleatless leads, so I installed them, but do not recommend that people go to the trouble and expense of installing such a second track on each side. The best thing to be said for this extra track is that if the regular fairlead breaks, the outer one makes a decent emergency replacement. Note how our main track is about 12" (30 cm.) long and runs as close to the outer edge of the inner seat board as possible so that the support under the cleat rests on the inner edge of that board. The aft edge of the track is bolted through both seat board and thwart, while the rest of the track is also bolted but only through the seat board. This is not the case with many "factory" equipped boats and I recommend bolting as a good safety play. Although the above photo doesn't look like it, our cleat support rests nicely on the seat board. A lot of Wayfarers come with the track on the inside edge of the outer board. This leaves the cleat support hanging over the space between the two boards. If you like your track in that position, you should fill that gap between the boards with an appropriately shaped length of wood or metal, and then make sure your cleat plate has a support that keeps it angled slightly upwards. I have just jotted this down off the top of my head more or less. Your critique, questions and/or suggestions for improvement will be welcome c/o Uncle Al. |