|
by Mike McNamara <michael@mcnamara-sails.com> for .pdf version download, right-click here .. |
||||
|
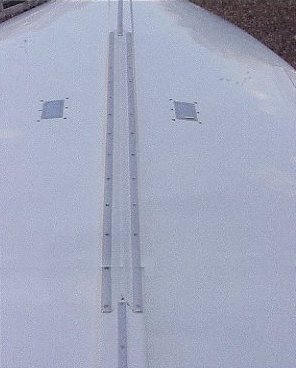
Fitting
slot gaskets to your Wayfarer in NOT difficult.
|
||||
|
Slot Gasket Material. You have been supplied a pair of heavily coated stiff polyester gaskets. When fitted, these will overlap in the middle by 5 mm, and their outer edges will be trapped underneath the side keel bands. Before fitting them, check that they are the right width for your boat. Each gasket should be half the width of the distance between the outer faces of the port and starboard keel bands plus 2.5 mm for the overlap in the centre. If they are too wide, trim them before going any further, as this cannot be done on the boat without damaging the hull surface. If they are slightly narrower, it does not matter - provided the material can be secured in place by the screws through the keel band. The gaskets are at least 1300 mm long, and have an eyelet at the aft end. Tools and Equipment. You will need:
|
||||
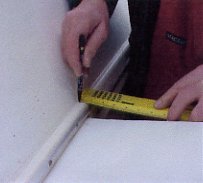
Step 3.
a) Stick the double backed tape along each side of the centreboard slot just inside the lines on the keel made in Step 2a. Leave the backing paper on.
|
||||
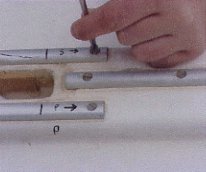
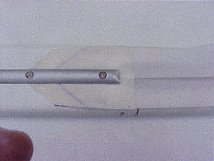
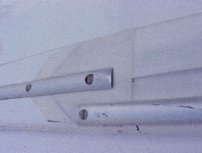
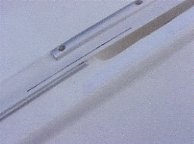
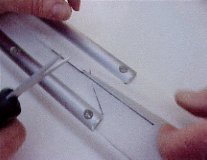
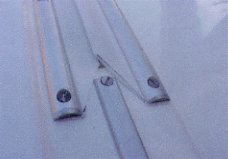
Step 4
a) Remove the backing to the double backed tape at the front of the case and slide the gaskets and the Mylar covering into position under the back of the bow keel band. Press it all down very firmly squeezing each side of the mylar slightly inwards to form a bulge. This enables the gaskets to open out as the centreboard is lowered.
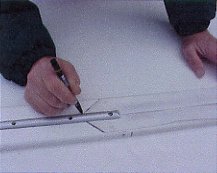
g) Mark at intervals, a 5 mm line in from the inner edge and remove tensioning puchase. |
||||
|
||||
|
||||
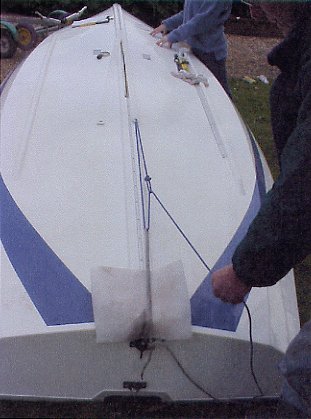
| Step 7
With the boat on its side, check that the centreboard still moves freely up and down. Stand back to admire a job well done. |
||||
|
Why not think about a new suit of Wayfarer
Sails to go with your supa dupa slot gaskets?
|
||||
|
----- Original Message
-----
Michael, I have fitted the closure strips and I have admired "a job well done". While fitting them I encountered the following problems - use my experience as you please for the benefit of other Wayfarers: The explanation of the fixing of the front of the strips and the piece of Mylar gave me some trouble. Perhaps because the photo wasn't clear in my copy of the documentation. I fitted both the front of the strips and the Mylar under the first screw of the front keel band. This single screw is not strong enough to withstand the tension after the bands are tensioned. The result, the bands were torn out. I solved it by inserting the first screw of each centreboard keel band as well. That way I had three screws (two for each strip to take the tension. One of the reasons the strip tore was that the screw of the front keel band went only partially through the strip as it was not dead centre. Later, I understood only the Mylar piece goes under the first screw and the strips go under the first two screws. The only double backed foam tape I could find was unreasonably expensive. (BTW, did you know there are two variations, waterproof and non-waterproof?) I finally settled for window tape that later turned out to have glue on one side only, so I discarded that. But what do you do on a Sunday when all shops are closed.... The answer: SIKAFLEX! It worked like a charm and the final thickness of the package is even less than when using foam double-backed tape. The closure between the hull and the keel bands is near perfect. Also the front of the closure strips and Mylar plate is now very smooth due to a small amount of Sikaflex. Sikaflex glues like xxx (xxx = what ever the English expression is), better than double-backed foam tape, I suppose. For some reason the Sikaflex pours out on the outside and not between the hull and the closure strips. The excess Sikaflex is easily removed with some thinner and lots of kitchen paper. The only downside I could find was that my hands were black for the rest of the week..... Best wishes, and thank you for an outstanding product. Ton Jaspers (W5011)
Many thanks for your e mail. Sounds as if you did a really good job well done on the sorting out the screw problem. What you say makes very good sense. As does the news about Sikaflex. How do you remove it though, in a few years' time? Well done, Michael.
Michael, You have spotted a possible problem, however, I think it depends on the individual skills of the person that has to remove the keel bands and closure strips again. I have been using Sikaflex and similar PU products for some time (not for closure strips though). I don't like Sikaflex because of the solvent used. The solvent makes the sealant/glue harden more quickly but has the risk of trapping vapour bubbles. An Industrial PU-sealant has the same results and because of the absence of a solvent, has no risk if trapping bubbles. The down side of these industrial products is that they take 24 hours or more to set. Personally I find that to be a nice characteristic as it allows me much more time to handle it. Also the Industrial products are far less expensive (Sikaflex 50 milliliter = 8 Euros; Arc Loyal MS-Polymer = 10 Euros for 300 milliliter, both are prices from my local chandler). Due to the absence of a solvent I generally use a tube for two years after opening it before it gets to thick to be useful. Sikaflex I have to throw out weeks after I opened the tube. Removing can be a pain but is usually best done with a sharp blade. I figured that by the time the closure strips need replacement they will be worn out and can be removed destructively. I plan to do this by removing the screws and slide a thin hobby blade in between the keel bands and the keel. Last year I fitted the keel bands with Arc-Loyal MS-polymer (I did not trust the waterproof-ness of the keel band screw holes anymore). When done carefully (point the blade slightly up towards the keel bands), the keel bands come of without a scratch on the hull. Then, with the same blade I carefully removed (most) of the sealant/glue and put some new on to fit the closure strips. The only time I had real trouble with removing the sealant/glue, was when I wanted to remove a cleat with a relatively large footprint. I could not get my blade deep enough because of the friction between the sealant and the blade. But I don't think this will be a problem with the 12-mm wide keel bands. However, a problem may occur once the tensioning rope is removed, the screws will take all tension until the sealant/glue has set. That could take over 24 hours. I suppose the best solution would be to leave the tensioning ropes on until the sealant/glue has set completely. Basically PU polymers are two-component products. The catalyst is water, usually water vapour from the air. It means that the polymer will set under water just as well as it would ashore. It is a bit of a dirty job as much of the filler somehow always seem to end up on my hands. The double-backed tape you propose is, if not a better, a cleaner solution. Best wishes, Ton |
||||